Showing posts with label DIY. Show all posts

Wednesday, 9 October 2013

Liberty DIY | Découpage bowl

Everyone did papier maché as a kid right? Well the Liberty Craft Blog (yes, it exists!) recently featured a tutorial for papier maché 2.0 and it's way out of the league of anything I even made growing up. 


Instead of newspaper, they used material! Inspired! Why didn't I think of that? It's the perfect project to recycle old material scraps you have lying at home.

Sunday, 6 October 2013

DIY | Framed Collections

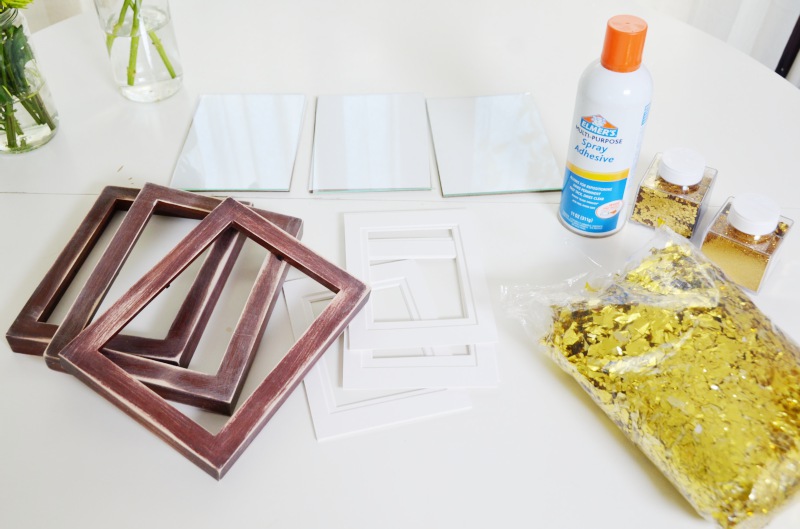
How about making art out of stuff that you can't bear to throw away but that has no real use? I'm a hoarder and keep everything from attractive stamps to postcards to film and theatre stubs. Most of the time they end up gathering dust in a corner, but buy a cheap clip frame and they become something you want to put on your walls.


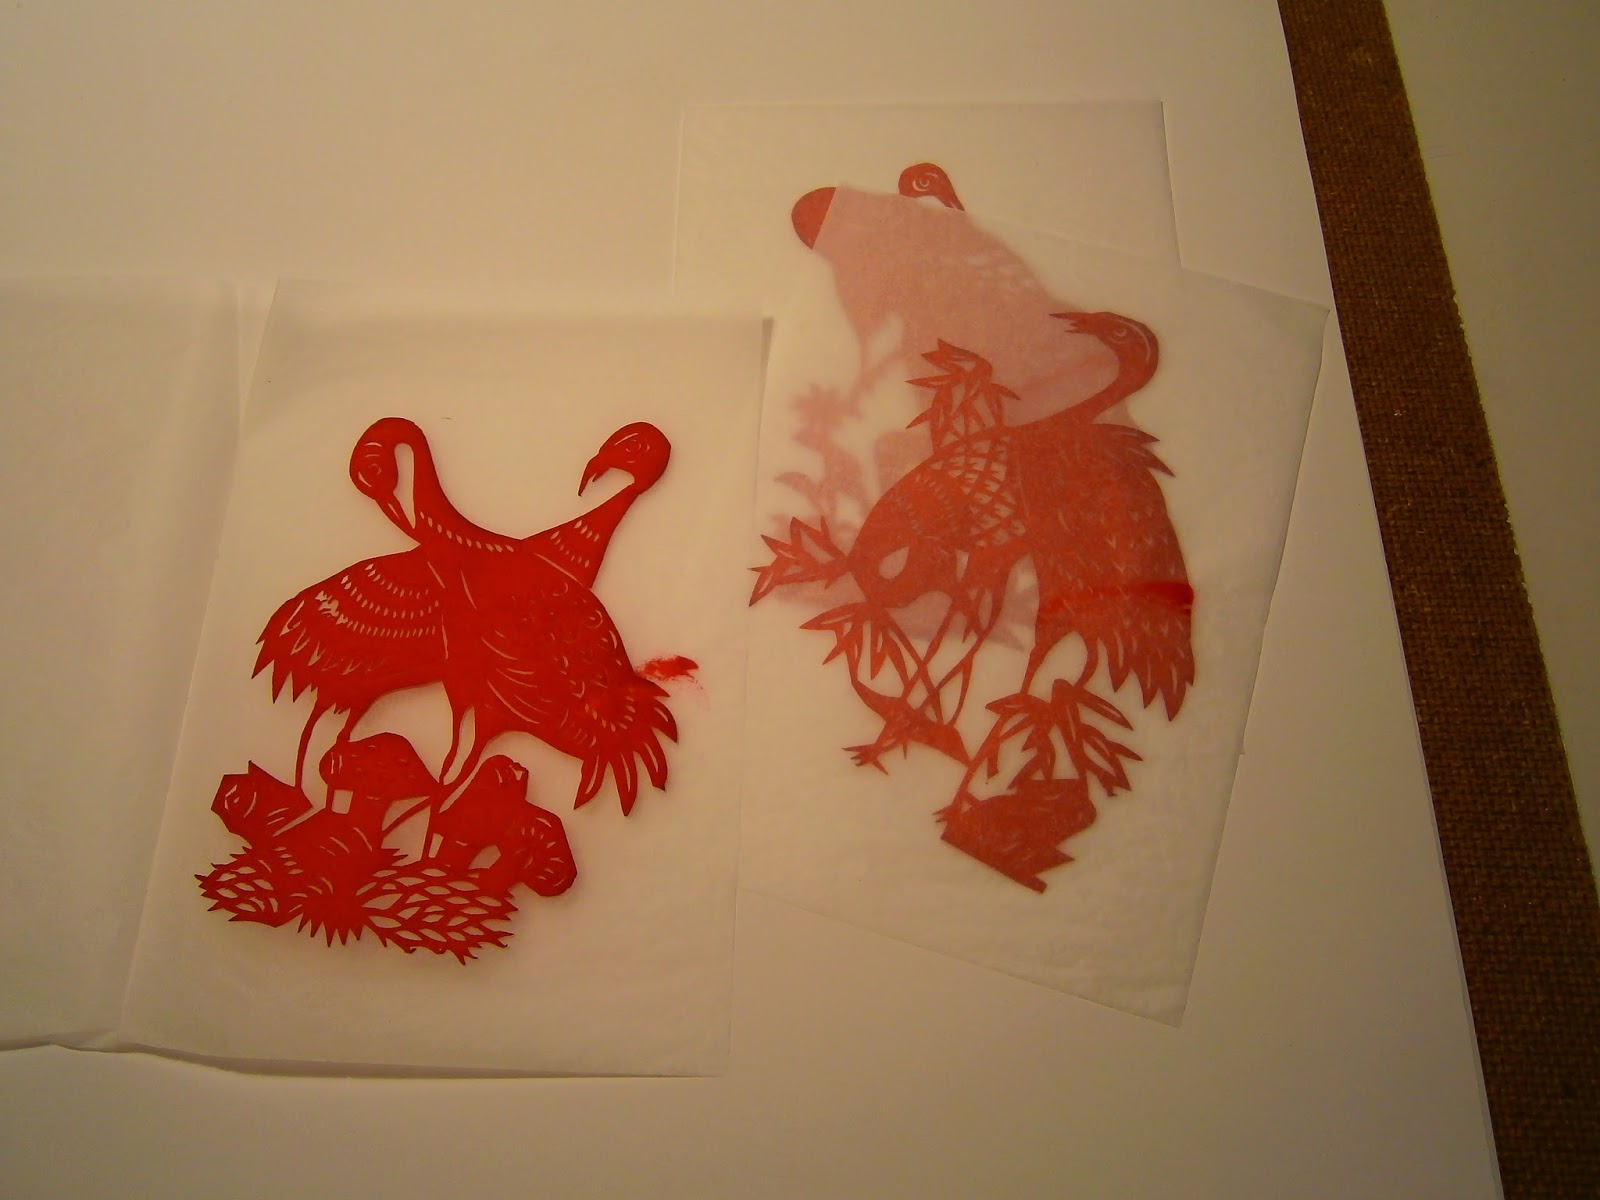
Ok, so the collection I've framed here was hardly ever rubbish - these delicate paper cut-outs (how the hell did someone cut out in such detail?!) were brought back from China to me by a friend - but they were sitting gathering dust because I didn't know how to use them. And the method is the same for any collection of things that you might have lying about.


Polish the glass and then DON'T touch the side that will go against your collection!


 Here are some other framed collections:

Stamps - an oldie but a goodie


Bags, a novel idea


Swimsuits - wacky but works


 And this woman who made a Valentine's Day present from the ticket stubs of plays she and her husband had been to together.


Images from hereherehereherehere

Tuesday, 27 August 2013

Other DIYers | Mr. Kate's Framed Glitter

I came across this cool tutorial via Mr. Kate, it's simple and would add easy sparkle to a room!


Tuesday, 20 August 2013

DIY | Charm Bobbins


This DIY really couldn't be much simpler: jazz up a hair bobbin with a charm and it will double as a bracelet when you wear it on your wrist.

I think they'd probably even make a cute and inexpensive present if you made three or so and tied them together with a ribbon. Especially since everyone ALWAYS needs hair bobbins!! 

"Thanks for dinner/Happy Monday/Good luck/insert-appropriate-message" says you, "I got you a little gift - some functional hair ties, customised just for you!" 

And the friends lived happily ever after.

Ingredients:
  1. Hair bobbin
  2. Charm
  3. Jump ring
Plus: pliers


Thursday, 25 July 2013

DIY | Accordion Ribbon Necklace


Do you remember this necklace I spied in Cos? I thought I'd try my hand at a DIY using supplies I picked up in my local bead shop and some grosgrain ribbon to add texture - turns out it's pretty simple!

Ingredients
  • 1m of thick grosgrain ribbon for the centre
  • 2 x 50cm of thin ribbon for the outsides
  • 1m nylon-coated wire
  • 2 wire protectors
  • 2 crimps
  • Clasp
  • A couple of jump rings (optional)
Plus
  • Strong needle with an eye large enough for the wire to go through.
  • Matches or a lighter

Begin by cutting the long piece and the two shorter pieces of ribbon in half, you should now have 6 pieces of ribbon. Seal all the ends with a match or lighter.


Then, starting with the thick ribbon, fold one strip over the other.


I found it easier to manage when I stuck the needle through from the start. Thread the wire through the needle and start pulling it through.


Once you've gone past the depth of the needle, you can use pins to keep the ribbon stack in place.


This way it won't unravel or lose it's shape when you let it go... 


...and you can stick the wire through in steps...


...until it's all threaded on.


Repeat these steps for the thinner ribbon on either side. When you've finished you can choose to secure the ribbon in place with a crimping bead that you squash with a pliers.


You're mainly finished now, all you need to do is attach the clasp. Using wire protectors is the best way to do it, as it helps prevent the wire bending and weakening.

It's very easy, all you do is thread another crimp onto the wire followed by the wire protector.


Put the other end of the wire through the other side of the protector...


...and then back through the crimp which you then squash with the pliers.


Fasten the jump ring through the wire protector and add a jump ring.


Repeat for the other end and add the clasp.


Variations

You could consider using more different widths of ribbon, or you could consider using different colours, maybe creating an ombré effect.

Wednesday, 10 July 2013

DIY | Sleeveless Men's Shirt


Menswear (shirts)
+
Womenswear (shapes)


à la Caroline Issa (right)


Here's my take on the sleeveless shirt:

A guy friend of mine was recently moving house and throwing stuff out along the way. He had an old cotton shirt that was a bit stained under the arms and whose collar was starting to fray. It was heading for the bin when I saved it for some DIY regeneration! 

By unpicking the collar and sleeves the shirt becomes much more structured and really pretty smart looking (read: no longer an old, man's shirt that you threw on coz it's comfy). It also counters the two main problems you come across in old shirts - wear on the collar and cuffs, and underarm staining - which make an otherwise perfect shirt scruffy and unwearable.

Ingredients:
  • 1 man's shirt
Plus:
  • Ripper
  • Scissors
  • Matching thread
  • Sewing machine optional
Rip the seams at the collar and arms.

Tuesday, 25 June 2013

DIY | Liberty Turn-ups

Why not add a splash of colour when you turn up your jeans for the summer? And what better way than using Liberty bias-binding? Yay!! (You just may, may, have noticed that I am totally enamoured of this stuff) The bias-binding is only seen if you decide to turn them up and turn them up twice and it's hidden again so you haven't limited your jeans-wearing options either!

This DIY fulfilled a duel function for me: I recently cut these jeans to shorten them but went too short - I didn't leave enough to fold the hem over on itself. The hem frayed badly and the bias binding stops this - practical as well as decorative!


Ingredients;
  • Jeans
  • (Liberty) Bias binding
Plus
Pins
Sewing machine or needle and thread(sewing machine not necessary)

Tuesday, 18 June 2013

DIY | Shoelaces


Did you know that the bits at the end of your shoelaces are called aglets? And that they serve a very useful duel purpose of preventing the ends from fraying and making shoes easier to lace? Didn't know how useful? Have you ever laced a shoe with something unconventional - such as string, say, or bias binding, both of which are impossible to seal by burning (as you would with ribbon)? That is why the aglet is so important and it is the key to this DIY. They also give DIY-ed laces a satisfyingly finished look which is hard to achieve otherwise.

...Actually, no, I lie : the aglets aren't the only key to this tutorial. This Liberty bias binding (which I discovered in France and can only get mail-order here in Ireland) is also very, very key. Can't afford these? Well, this will do for the moment!


Ingredients
  • 120cm/47inches of ribbon or bias-binding (the length of converse laces)
  • 4 clamps - I got mine in a jewelry shop
Plus
Pliers