Would you believe that this singlet was made out of a pillowcase?
Surprisingly easy and soft and breezy for a beautiful summer's day!
Surprisingly easy and soft and breezy for a beautiful summer's day!
The big star of this show is bias binding (have you noticed my deep love for this stuff?) It makes hemming sooo much easier.
Ingredients
- Pillowcase
- approx 2.5m of bias binding
- hemming tape
Plus
1. STEP ONE : CUTTING
Use a top you like the shape of as a rough guideline.
Cut out neck- and arm-holes from the top of the pillowcase (the part that doesn't open ;) )
Fold in half to make sure you've cut evenly.
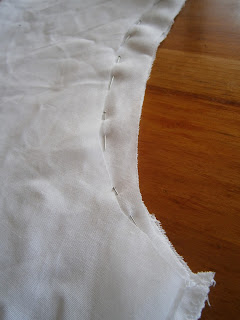
Cut into the arm-holes slightly more at the front.
Tip: In order to help you do this fold the pillowcase in half and pin along the edge on one side. Then on the other side you can cut along the pinned line.
2. STEP TWO : SEWING
Bias binding time!
Sew your bias binding all the way around the neck- and arm-holes...
...finishing by overlapping the bias binding.
This next step you may not need to do depending on the curve of your sleeve I found that sewing the bias-binding around the arm-holes made them stretch out of shape so I folded the edges inwards and secured them with hemming tape.
Now to hem the bottom: fold up the edges, pin and sew!
Voilà! You're done!
Mlle.Brico, bringing a new meaning to the term 'bed clothes' ;)
3.EXTRAS
I decided, to spice up a very basic top, that rather than sewing a straight hem all the way around I would open the side seams a little. It's very easy, here's how;
I decided, to spice up a very basic top, that rather than sewing a straight hem all the way around I would open the side seams a little. It's very easy, here's how;
Rip the side seams up as far as you want them to go. Hem as before but don't go all the way to the edge.

Fold the side edge over and tuck into the bottom seam...
Then sew around the edges, starting from the bottom hem.
Tip: Lift the foot of the sewing machine but leave the needle down and rotate the material in order to turn the corners.
Using this technique you can make the back of the shirt slightly (or a lot) longer than the front of it if you want to.
.jpg)


.jpg)
.jpg)

.jpg)


.jpg)
No comments:
Post a Comment